
You can 3D print cosplay helmets, armor and props without an expensive printer. Galactic Armory, a YouTube cosplay channel that sells helmet files, built a full Helldivers helmet on a Bambu Lab A1 mini by splitting it into many small parts, and put the bare-bones total, including the printer, filament, glue and paint, at about $437 (Galactic Armory, “What Does It ACTUALLY Cost to 3D Print Cosplay?”). Bambu Lab sent the channel that printer.
Once you own the tools, each later helmet costs about $50 to $75 by the channel’s estimate. The finishing work matters as much as the print: Kevin of 3D Printed Props walked through sanding, filling and priming a helmet (3D Printed Props, “Finishing 3D Prints: How to Sand, Fill and Prime 3D Printed Parts”), and Frank of Frankly Built laid out five skills beginners need, from scaling files to wearing the finished suit (Frankly Built, “5 Tips to know BEFORE you 3D Print Cosplay!”).
This post contains Amazon affiliate links. If you buy through them, I may earn a commission at no extra cost to you.
What You Can 3D Print for Cosplay
- Helmets and masks
- Armor plates (chest, gauntlets, greaves)
- Props: blasters, swords and gadgets
- Horns, ears and wings
- Badges, buckles and small details
How to 3D Print Cosplay: The Five Skills
Frankly Built lists five skills to learn before printing cosplay: scaling files, cutting them to fit your printer, fusing parts back together, making them wearable, and painting (Frankly Built, “5 Tips to know BEFORE you 3D Print Cosplay!”).
1. Scale the model to your body
Frank says bad scaling wastes the most filament; he once printed a Deadpool helmet far too small (Frankly Built, “5 Tips to know BEFORE you 3D Print Cosplay!”). His favorite trick is a test ring: slice off just the bottom band of a helmet and print that to check the fit before committing to the full print. Printable cosplay calipers help you measure your head and body. Paid options include ArmorSmith, a scaling program he put at about $35 to $40, or a 3D scan of yourself made with a phone app.
2. Cut large parts to fit your bed
“Realistically you can print anything on any size 3D printer,” Frank says; a small bed just means more cuts (Frankly Built, “5 Tips to know BEFORE you 3D Print Cosplay!”). Orca Slicer and Bambu Studio have a plane-cut tool, and you can add connectors or dovetail cuts. He also likes Meshmixer for detailed cuts because parts stay in place after cutting. Avoid cutting through heavily detailed or textured areas when you can.
3. Glue and reinforce seams
Both channels use two-part CA glue with an activator. Galactic Armory says the bond is stronger than the print itself, and it first sands every mating edge flat on 120-grit paper so small print variances don’t add up (Galactic Armory, “What Does It ACTUALLY Cost to 3D Print Cosplay?”). Work in a ventilated area. Because CA glue is brittle, the channel tested three reinforcement tools:
- Soldering iron: melts and pushes plastic together, but can leave thin spots.
- 3D pen: adds PLA, so it can bridge gaps and cover seams. This is what Galactic Armory chose.
- Heat staple gun: the “nuclear option”; it leaves sharp metal barbs, which aren’t ideal inside a helmet.
Frank’s favorite for strength is PLA welding with a soldering iron, after tacking parts with a little super glue (Frankly Built, “5 Tips to know BEFORE you 3D Print Cosplay!”). He warns not to let the iron touch the super glue, since it vaporizes into an eye-irritating gas.
4. Make it wearable
Frank lines helmets with cheap acoustic foam, which is light, breathable and easy to cut (Frankly Built, “5 Tips to know BEFORE you 3D Print Cosplay!”). For armor he uses elastic bands, nylon straps, plastic buckles, Velcro, self-centering purse magnets and strong neodymium magnets, often glued in with the same CA glue.
5. Finish and paint
Sanding, filling and priming hide layer and seam lines; the next section covers the process.
How to Finish 3D Printed Cosplay Parts
3D Printed Props starts with a mask on, since sanding turns plastic into fine dust (3D Printed Props, “Finishing 3D Prints: How to Sand, Fill and Prime 3D Printed Parts”). Kevin’s sequence:
- Sand the whole helmet at 120 grit, then 220, 320 and 400. Wrapping sandpaper around a sponge helps reach crevices.
- Wash the print, then spray a generous couple of coats of sandable filler primer from 8 to 10 inches away.
- Fill deeper lines with Bondo glazing and spot putty applied with foam, then sand at 400 and 600.
- Clean primer out of details with small rasps and files.
- Wash, then wet sand at 600 and 1,200 (or up to 2,000) grit before paint.
Galactic Armory’s approach is similar but uses a body filler (automotive icing) for seams, because glazing putty cracks when applied too thick (Galactic Armory, “What Does It ACTUALLY Cost to 3D Print Cosplay?”). Its rule: “sand the filler, not the print.” After testing several filler primers, it prefers Seymour over cheaper Rust-Oleum for coverage and dry time, and gives each coat 20 minutes. A thin black “ID coat” reveals low spots during sanding. It also suggests blocking supports under a helmet dome to save time and material, and testing paint colors on test shapes or plastic spoons first.
Video: Galactic Armory, “What Does It ACTUALLY Cost to 3D Print Cosplay?”. Embedded with credit.
Small Printer vs Large Printer for Cosplay
Galactic Armory printed the same helmet in about 16 parts on the A1 mini and in one piece on Bambu Lab’s larger H2S (Galactic Armory, “What Does It ACTUALLY Cost to 3D Print Cosplay?”). The one-piece print skipped assembly, seam reinforcement and seam filling. Its conclusion: you can make an A1 mini work, but it costs a lot more in hours.
3D Print Cosplay Costs
Prices from Amazon at time of writing. I may earn a commission from links, at no cost to you.
| Item | Galactic Armory estimate |
|---|---|
| Bare-bones total incl. printer, filament, glue, paint | About $437 |
| With power tools (3D pen, detail sander, mouse sander) | About $570 |
| Each later helmet | About $50 to $75 |
| File set for seams | About $10 to $15 |
Best Printers for Cosplay
| Printer | Price (Amazon, Oct 16, 2026) | Why it fits | Link |
|---|---|---|---|
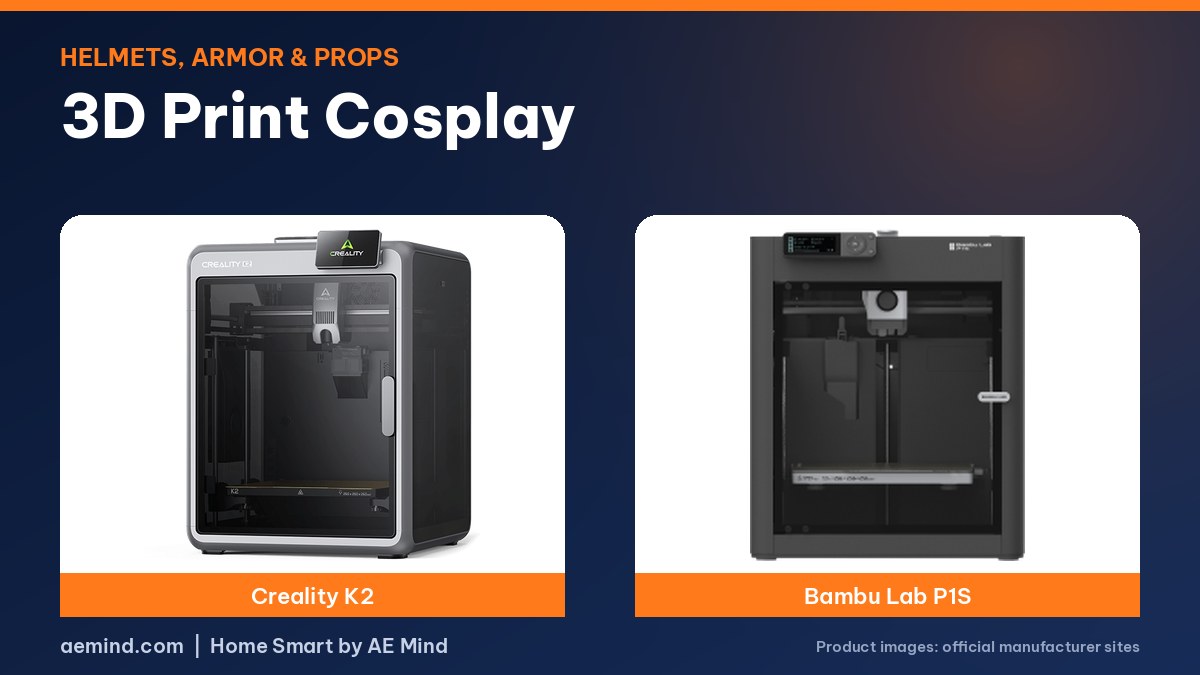
| Creality K2 Combo | $549.00 | Large 260 mm bed means fewer splits | Check price |
| Bambu Lab P1S Combo | $549.00 | Fast and enclosed for long prints | Check price |
| Bambu Lab A1 mini | $249.00 (LED lamp kit bundle) | Galactic Armory made a full helmet on it with more splits | Check price |
Cosplay Printing Tools
| Tool | Use |
|---|---|
| Two-part CA glue | Joining parts |
| 3D pen or soldering iron | Bridging and reinforcing seams |
| File set and sandpaper (120 to 2,000 grit) | Removing seams and layer lines |
| Filler primer | Smoothing |
| Glazing putty and body filler | Filling lines and gaps |
| Respirator or mask | Sanding dust and fumes |
3D Print Cosplay: Frequently Asked Questions
Can a small printer make a cosplay helmet?
Yes. You split the helmet into more pieces and glue them together. Galactic Armory did it on an A1 mini.
What filament is best for cosplay?
PLA is the most common. It is easy to sand, paint and weld with a soldering iron.
How do I hide layer lines?
Sand, use filler primer, fill with glazing putty, sand again, then wet sand before paint.
How do I make sure a helmet fits?
Measure with cosplay calipers and print a test ring from the bottom of the helmet first, per Frankly Built.
How much does 3D printed cosplay cost?
Galactic Armory estimated about $437 for a first helmet including the printer, and $50 to $75 for each one after.
Sources
- Galactic Armory, “What Does It ACTUALLY Cost to 3D Print Cosplay?”
- Frankly Built, “5 Tips to know BEFORE you 3D Print Cosplay!”
- 3D Printed Props, “Finishing 3D Prints: How to Sand, Fill and Prime 3D Printed Parts”
- Amazon product listings for the printers linked above, October 16, 2026
Related: Creality K2 vs P2S | A1 vs A1 mini | Bambu Lab P1S vs P2S
Notes and disclosure
Note: Printer prices come from Amazon listings on October 16, 2026 and change often. Costs, tools and techniques come from the credited YouTube creators; Galactic Armory received its printers from Bambu Lab. I have not built these helmets myself.